Air Combat Force Disbandment Parade
RNZAF Ohakea - December 13, 2001
The material is broken into three sections : pre-display on the flightline, post-display on the flightline, and the parade proper
While the aircraft were away, we wandered down toward the tower to wait their return from Wellington. Met a few folks I knew (like Paul Harrison) along the way. Chatted with Bede, John, and a couple of other folks till the aircraft arrived. Quite a crowd formed out in front of the control tower - looked like the place to be! The Macchis gave a short display and landed. Unfortunately a maritime paint scheme and a steadily darkening sky do not make a good combination for photography. This was one display that would really only last in my memory.
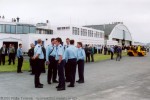

Top Left: A huge crowd gathered as we waited for the aircraft to return. In this view we look from the
tower down toward 75 Squadron. People were evrywhere - even up in the hangar. Top Centre: As
always, the C-130 makes a great vantage point and a few people found their way on top (PTS CT-4Es
can be seen in the foreground). Top Right: Amongst the waiting crowd were a good number of former
servicemen and it was clear there were a number of reunions going on. Bottom Left: First to appear
were the Macchis in tight formation. Unfortunately the darkening sky made photography difficult.
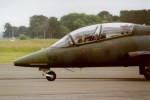
Bottom Centre: I did manage a few photos as the aircraft returned to the flightline led by '61'. Bottom
Right: As can be seen, the pilots weren't smiling, as can be seen in '62'.
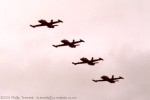

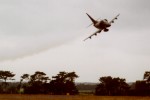
Then after a short wait (while we wondered where they would appear from), the Skyhawks gave their display. The team made several passes in changing formations for the flypast, and we awaited 'Easties' solo. S/Ldr Easthope, CO of 2 SQN was the solo display pilot in NZ6205, and earlier in the week he had made a spectacular low pass. There was some debate as to what would happen this time. His display was as good as anticipated - and the highlight was a 480kt pass at 50'AGL. (That's what I was told - I look at the photo and see an aircraft with a 27' wingspan still nose down at the start of a run - what do you think?) He passed less than 100 metres from us. Very loud, very exhilirating, and absolutely wonderful! But I must admit I found it really disturbing - this was one of the best examples of flying I've ever seen, but I had to think about the reason I was there to see it.
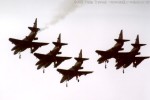
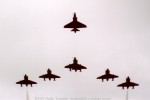
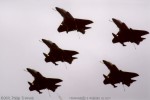
Above: A selection of formation pictures against the darkening sky. Below left: S/Ldr Easthope begins
his low pass at 480kts. Below Centre: S/Ldr Easthope back on the ground. Below right: Another member
of the formation, '16' returns to roost.
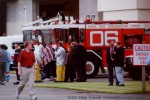
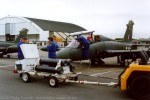
After the aircraft landed we wandered down the flightline as the groundies post-flighted the aircraft. Got a heap of pictures before moving onto the Macchis. This selection shows some of the post-flight activity.
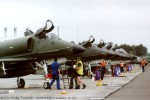
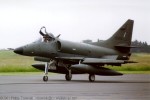
Top Left: '02' taxies in, showing nicely the 300 US Gallon external fuel tanks carried on stations 2 and
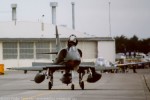
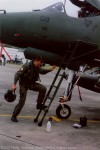
4 and the 'buddy' refueling tank on the centreline. Top Centre: As the aircraft approach their parking point,
the ground crew get them to stop about half a metre short. The tyres are then checked for wear before the
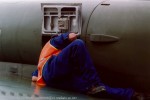
aircraft is moved forward to it's spot. The intake blank and ladder are then fitted to the port side and the
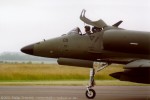
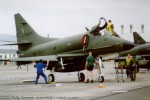
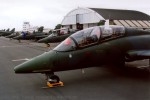
pilot is able to disembark. Top Right: S/Ldr Easthope disembarks from '05'. Bottom Left: The ground crew
move in - and this particular crewman has just discovered that '05' has a number of popped rivets in the
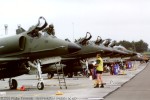
leading edge slat (it was quite a display). Bottom Centre: The other end of the line up as the ground crew
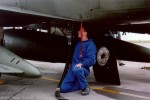
replace the braking chute packs with new containers. Bottom Right: The pilot returns to '01' for some
'last flight' photos.


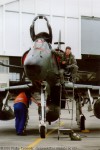
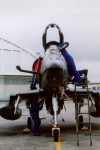
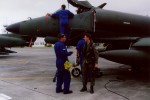
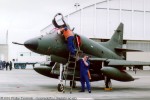
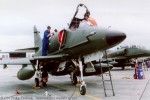
Top left: As the ground crew get to work with their post-flight routine this poor pilot is harassed for
some photos. Top centre: Blanking plates in, pins in, covers on - there's a lot of work to do. Top right:
Another pilot returns to earth after some photos. Below left: He then stops to chat with the ground crew.
Below Centre: HUD covers on and pins in place. Below right: More checks as the fuselage access panel
is opened up.
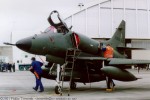
Top left: Once the covers are on, in the bowels of the aircraft there are more things to be checked. Top
centre: Once made safe, then work can begin on preparing the aircraft for its next flight. Top right:
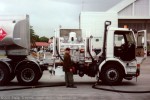
Fuelling is next - the aft 'hell hole' cover is removed to access the fuelling point and panel. Below left:
The Saab tankers are set up to refuel two aircraft at a time. Below Centre: Work was also happening
on the Macchis at the end of the line, with fuel and LOX to be replenished. Below right: A last look
up the line as things calm down a little.
By this stage I'd lost John. Wandered down to 14 Squadron, then went to the main gate to get the event visitors pass. They sent me to the theatrette, who wanted me to go back to the main gate as they'd run out. I didn't bother. Found John, and we went over to 14 Squadron to await the arrival of the Standards . Got programmes and a souvineer booklet (lovely glossy 60pp history of the ACF put together by former RNZAF Public relations Officer S/Ldr Paul Harrison (retd)) when they were handed out. Then the parade started.

 © 2002 Phillip Treweek, all rights reserved